We had one of our twice yearly scrap weekends up in Saginaw. I was able to finish a gift book that was long over due and 6 pages and started a 7th so overall not bad considering I packed for the weekend in about 30 minutes and tried to not page too too much.
Supplies: Felt Turkey (see my pin on pinterest) Felt Flowers (handmade) Storybook cartridge for the shapes Opposites Attract for the letters Chipboard florishes Rhinestones and pearls
Ever since I made that tigers banner I have been thinking about what I would do for Halloween, Thanksgiving, and Christmas.I am quite happy with how this one turned out :-)
Ingredients for this Spooky creation:
Bazzil Cardstock Hallowhimsy patterned paper (Super cute!) Storybook, Doodlecharms and Stretch Your Imagination cartridges for the Cricut Misc: Glitter pen, twine and leftover stickers
and Dunn... Just finished this bit of fabulousnous for the mantel. Paper Mache letter D from Joann's, cream yarn and felt flowers and a sprig of faux flowers to finish it off.
I have gotten so much inspiration lately from Pinterest (follow me if you are on there). I made these little beauties for a little cutie whose birthday is on Tuesday!
This was my second go at sewing up a camera strap cover, this one turned out much better actually, there are a few more kinks to work out, like when you sew the ruffles on the base if you go too fast it ruffles the base a bit which makes it shorter then the other side and sewing much closer to the edges is great as long as you make sure you are sewing through the edge on both sides, otherwise you will end up with holes in your strap (they can be fixed but its a pain). Now that I have used up both of my kits, I am going to try to make a couple on my own. All my camera toting friends don't be surprised if you get for Christmas or your birthday :-).
I am not by any means a seamstress, so I am not sure why I ordered 2 "do it yourself" kits to make a couple more fancy camera strap covers for myself. I figured at the very least I could ask Jeff to show my how to use the sewing machine (yes he knows it better then I do) and if I had to I could enlist Jessica who is a pretty skilled sewer. I took all the bits and pieces from the kit and followed the directions. Mine wasn't quite perfect, but pretty good I know the couple adjustments I need to make so the next one is perfect. I have some extra fabric I didn't know what to do with so now I can whip up a few of these so my neck is comfy and my camera is styling.
It was tricky taking a picture of the strap while on the camera so the photo isn't the best...but you get the jist of it. Cute huh?
I saw this pattern a while back and now that I actually have something to put in it I had to make it. A few nights at home feeling sick were a great time to knock out this project...and amazingly enough I did it ERROR free!! There are a few things I would change myself in the pattern if I make another one, but overall it will serve its purpose of keeping my iPad nice and safe inside my bag.
This is a project that has been in process since May. Hopefully it will be finished soon and I can post the end product!
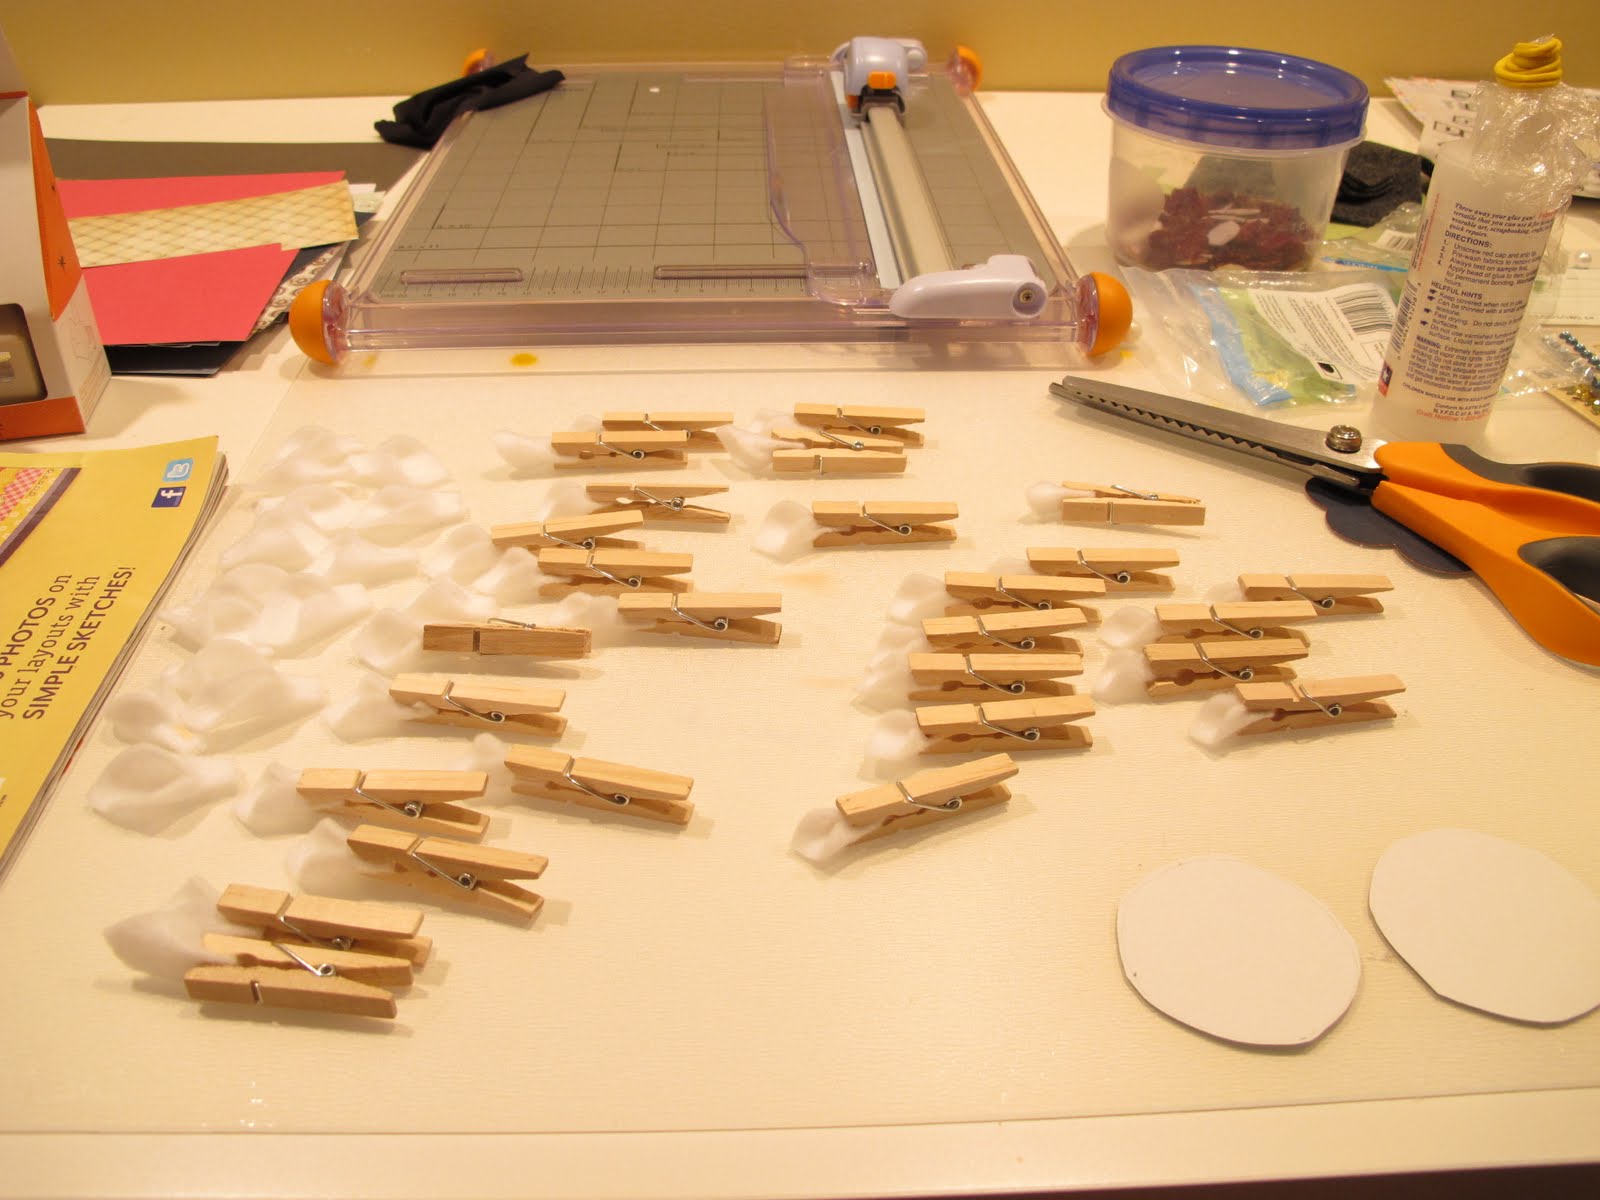
Here are the steps to making a fabulous decoration for your office or studio.
Step 1: Gather all the materials you need:
A foam ball around 4-6 inches depending on how large you want it and a foam base that will fit into your vase (they have squares, cones, cylinders, choose what works best for you, pearled straight pins (I like a variety of colors) paper circles cut in sizes from 1.5 inches up to 4 inches (I cut mine on the cricut but you could do it by hand if you have a LOT of patience) and a hot glue gun.
Step 2: Cut all the circles in spirals, I just free hand this if they have a little wave it just adds the flower's petals.
Step 3: Working from the outside in role the spiraled paper into a bud and secure it with hot glue, use the very inside of the circle to serve as the bottom of the bud. Then press a pin through the middle (careful not to poke yourself). Do this about a hundred times or so. I started pinning mine into the circle right away, if I did it over again I would wait until I had almost as many flowers as I needed to make it easier to fill in.
Stay tuned for the next steps and finished project!
Over the weekend at Dickenson Island, after I had a bit too much sun I was able to finish a knit bracelet for Andrea (I have a few more to make yet...) It was my second attempt at it. I think Jill has the first one. I wanted to teach myself how to knit cables and trying it with something small seemed manageable.
With anything knitting if I can't remember quite how to hold my needles or turn them You Tube is the answer to all my questions. It is a great resource and it doesn't care if you have to play the video 7 times before you actually figure it out.
Don't you just love it when you can get something for free?! Well this was almost free (had to pay a nominal fee for shipping)
New and very pretty personalized note cares from Shutterfly. I swear I really just ignore them and only order when they offer me 50 or a 100 free prints so I don't know why I am so lucky to keep getting these fun offers.
A long while back I posted the beginning of the scraproom makeover. While I would say the finishing touches have been done for about a month or two so its probably time to post those pictures as well.
There is a lot of workspace and a good amount of storage, it seems snug looking from the outside in but when you are in there creating you don't notice the coziness of the room.
Furniture: Ikea Shelves: Target
Storage: Joanne's, Sears and some miscellaneous stuff.
At the request of his mom - I whipped up one more pair of cuffs to keep another set of hands warm for my baby nephew Holdan. Let's hope we don't need these much longer!
Yay!! My prize arrived today - any mail that isn't a bill is always good mail!
What was in the box: 2 sets of stamps plus one individual stamp 2 premade titles A few packs of stickers A set of markers 2 packs of metal embellishments A back issue of CK that I didn't have (so Crystal if I borrowed you Jan 2010 its all yours :-)) An official your part of the flock pin


 Supplies:


 Go Tigers!


 What was in the box: