Pages

Showing posts with label home decor. Show all posts

Saturday, October 6, 2012

Subway Art

I love that PicMonkey exists now that picnik is no longer around.  I recently learned how to make some cute subway art using PicMonkey so I created these to put on the mantel in celebration of a very fun time of year!


Wednesday, January 25, 2012

Fortune Frame


What do you do with all those fortunes from your take out Chinese? Glitter and glue them to an inexpensive picture frame of course! Add a couple felt flowers and you have your favorite fortunes preserved.

Materials:
Frame (Michael's)
Handmade felt flowers
Fortunes (various Chinese restaurants)
Glimmer Mist
Modge Podge (to glue and seal)


Monday, December 5, 2011

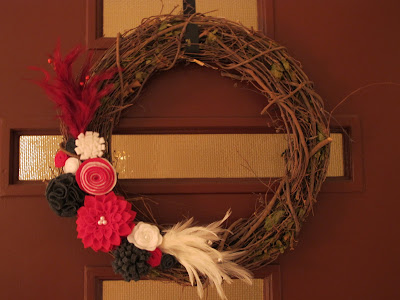
Grapevine and Felt Wreath

Tis the season to glorify God and celebrate all that Jesus Christ did for us. May you blessed and full of His love.


The finishing touch on our main floor decorations. Felt flowers, feathers and a little hot glue and a lot of love can make some very pretty things.


Friday, November 11, 2011

Thankful

For all the wonderful blessings in my life!


Supplies:
Felt Turkey (see my pin on pinterest)
Felt Flowers (handmade)
Storybook cartridge for the shapes
Opposites Attract for the letters
Chipboard florishes
Rhinestones and pearls

Sunday, October 2, 2011

D is for Delightful

and Dunn... Just finished this bit of fabulousnous for the mantel. Paper Mache letter D from Joann's, cream yarn and felt flowers and a sprig of faux flowers to finish it off.


Saturday, September 3, 2011

Paper Banner

In preparation for the family's visit next week, I put together a festive banner to root on our team!


I covered the clothes pins in some ribbon I had in my ribbon jar (luckily I had matching colors!)

I used the Create a Critter cartridge on my Cricut to make the Tiger (RRRoarr!!)

Go Tigers!

Tuesday, August 16, 2011

Paper Topiary Part 1

This is a project that has been in process since May. Hopefully it will be finished soon and I can post the end product!

Here are the steps to making a fabulous decoration for your office or studio.

Step 1: Gather all the materials you need:

A foam ball around 4-6 inches depending on how large you want it and a foam base that will fit into your vase (they have squares, cones, cylinders, choose what works best for you, pearled straight pins (I like a variety of colors) paper circles cut in sizes from 1.5 inches up to 4 inches (I cut mine on the cricut but you could do it by hand if you have a LOT of patience) and a hot glue gun.

Step 2: Cut all the circles in spirals, I just free hand this if they have a little wave it just adds the flower's petals.


Step 3: Working from the outside in role the spiraled paper into a bud and secure it with hot glue, use the very inside of the circle to serve as the bottom of the bud. Then press a pin through the middle (careful not to poke yourself). Do this about a hundred times or so. I started pinning mine into the circle right away, if I did it over again I would wait until I had almost as many flowers as I needed to make it easier to fill in.


Stay tuned for the next steps and finished project!

Wednesday, June 15, 2011

Finished Studio


A long while back I posted the beginning of the scraproom makeover. While I would say the finishing touches have been done for about a month or two so its probably time to post those pictures as well.

There is a lot of workspace and a good amount of storage, it seems snug looking from the outside in but when you are in there creating you don't notice the coziness of the room.

Furniture: Ikea
Shelves: Target


Storage: Joanne's, Sears and some miscellaneous stuff.


Sunday, January 30, 2011

Scrapping around the house

We have this little space between our downstairs bathroom and my scraproom and I found a frame set for a steal of a deal ($2) at a rummage sale quite a while back so Jeff hung the frames for me a couple weeks ago and this weekend I finally got them filled.

It is my spin on the "Live, Laugh, Love" decorations you see all the time. I used "Lucky Me" paper by Little Yellow Bicycle.

A couple other altered art projects I have done that I have in my scraproom are my initials that I covered in "Wildflower" paper from K&Co and my desk organizer. I found a clear organizer at Staples and then cut Que Sera Sera paper (also from K&Co) to fit around the organizer.